Wednesday, February 26, 2014

St. Patty Nails

  Festive Nails

Hiiiiiiiii Guys :-) If you didn't already know I really love putting anything holiday related on my nails! I don't like to be a plain jane when it comes to my long beautiful nails ;-) I recently just picked up this really pretty green color from Ulta the other day and I loved it so much that I just HAD to do a post with it. I wasn't quite sure what I could do with it but once I started looking at other colors I had.... I finally realized I could maybe do a St. Patty's day nail look (Yes I know its super early but I really don't care lol) So if you wanna see how I accomplished this easy fun look then keep reading ... :-)
How could you just not love this green? ITS PERFECT! it's called Posh just incase any of you were wondering!

This is the Second color I used and it is called Dream Girl
 
First, you are going to cover your nail with your base color


The second step is.... you are going to take the other color you have and drag the brush from one corner to the other and then repeat on the opposite side.

You should have something that looks like this and also fill in any blank areas if your brush didn't get them all.
Next, you should take your smallest dotting tool or a tooth pick and place two dots on the bottom of your nail

Final Result! How cute and simple are these nails?!!!?!? They are so easy to do and take no longer than 10 minutes to do!
Thanks for reading
xoxoxo Morgan

Thursday, February 20, 2014

Polish is the key!

COLOR IS IMPORTANT!

Hey everyone :-) so since I have taken off my acrylic nails I am ALWAYS changing the color/designs on my nails and having a lot more fun with it. I have always thought having fun colorful nails are the best way to go because who wants boring plain nails? NOT ME! (don't get me wrong.. I love me some nude nails but if you have zero color on your nails.. then please let me insist on buying you a gift card to the nail salon) lol anyways... I have always been artistic and creative and this is just another way for me to express and to have fun with art. If you guys are interesting on how I got this nail look then keep reading :-)
 
These are the set of nail polishes I used to create my nail look! These polishes can be found at your local drug store or even at Ulta (however the skinnier bottle was bought online with a million other colors but I'm sure you could find similar colors else where)
Names listed from Left to Right...
  1. Sexy in the city
  2. Snow me white
  3. Frenzy
  4. Sweet Sonnet
 

First you are going to want to cover your nail with your base color (P.S I am not a professional so if my nails look not to your standards then I apologize.. Oh and sorry how rough my actual nails look! the fake ones really damaged my nails so I've been doing everything I can do make them healthy again)

Second, you are going to want to take your sparkles and draw them from the bottom corner to the top corner.

Third, you are going to take a skinny brush (mine already came with a skinny line brush) and draw a line to separate the sparkles from the solid color.

Fourth, you are going to take your smallest dotting tool or tooth pick if you don't have a nail kit and simply place the white dots onto the line you just drew.


TAAAA-DAAAA! these are your results! hope you all try this out and have fun with this fun yet simply easy design :-)
XOXO - Morgan!
 

Monday, February 17, 2014

Eyeshadow (using neutral colors)

Hi everyone :-) just wanted to do a quick post because I know I will be busy these next couple days with papers to write and tests to study for but anyways..... Today I wanted to do a look I'm not normally comfortable with and something I don't wear daily. I actually decided to take a darker color onto my whole entire lid and use a lighter color for my crease. Now you are probably like.. What's wrong with that combination? Nothing is wrong with it.. It's just something I'm not use to seeing on myself BUT I wanted to give it a try since I see many YouTubers do it :-) so if you wanna see how I achieve this eye look then keep reading! 

Using Neutral Eye Shadow Colors

Wanna achieve this look? Keep reading down below :-)
 
I first took a matte brown and placed it all over my eye lid ( it looks much lighter on camera because of the flash but it is much darker in person )

Next I took this gold/bronze color and placed it into my crease and blended it out.
 
After Results! Btw; sorry about my hair.. I was in the middle of making my hair curly/wavy so that's why one side looks so flat lol
Thanks for reading everyone :-)
xoxo -Morgan

Sunday, February 16, 2014

Beauty Tips All Women Should Know!

Hey everyone :-) It's been almost a week since my last post and I've just been so caught up with school, valentines day and work. BUTTTTTT today I will be listing some awesome beauty tips I have heard about or tried and really recommend. Hope you all enjoy and use these tips in your lives when needed :-)


Mascara:

Almost every woman doesn't get to use all of their mascara in the container BUT... If you squeeze about 3-5 drops of eye drops in the tube.. it will be as good as new! (Please only do this if your mascara isn't 3 months old, that's when you should be replacing the old mascara with some new mascara! Otherwise you can get bacteria and a lot of other gross things in your eye.)


Stringy Nail Polish:

I HATE when my nail polish turns stringy and dry after awhile. However, if you just pour a little bit of nail polish remover into the bottle and shake it up! It should work just as well!
 

Plump Lips & Bigger Lips:

Before adding gloss or any color to your lips.. take a tooth brush and wet it under the sink and take the brush and begin to brush your lips in circle motions. This will plum them before you apply color. Also, if you want bigger looking lips pick out matte colors and a little lip liner never hurts ;-)
 

Softer Hair:

Instead of using hot water to wash out your conditioner, use COLD water. The hot water just washes everything out and with cold waters it makes the product stay in much longer.
 

Clear Skin:

SALT WATER! seriously it works and its so natural for your skin!!! If can bathe in a tub full of it, boil it in water and use it as a steamer for your face, or even as a scrub! I use it ALL the time and its amazing! better than any acne product I have ever tried!
 

Shaving:

Sometimes I bounce between conditioner and lotion when I shave my legs, Its cheaper if you don't have shaving cream and it makes your legs so much more smoother!
 

At Home Deep Conditioning:

This might sound gross but mayonnaise can do so much for your hair! if you add this to your hair for about 20-30 minutes and your hair will be SO SOFT! This method also works for if you have having hair lice! the only difference if you would just put the mayo in your hair and wrap your hair with tin foil over night and wash it out in the morning.


That's all i'll be sharing for now :-) Hope you all liked and use some of these in the future!
xoxo -
Morgan
 

Monday, February 10, 2014

Summer inspired look

So almost everyone knows how much I love the sun and being outside when the sun is shining! especially during the summer. I was born a July baby so I'm pretty sure I wasn't meant to live in such cold climates. I've been really missing the warm weather lately since all I ever see is snow everywhere I go :( so I decided to create a look that would put me in a better mood :-) If you want to see how I created this look then keep reading! (Sorry if the pictures look huge, they are at a normal size and it looks different on my iPhone, computer and tablet.)


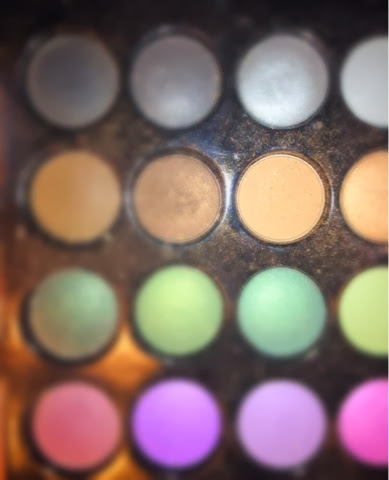
So this is a eye shadow palate that I picked up from Ulta for $10 dollars and I really like it ( other than the fact I dropped it and broke the cover for it ) BUT the colors are really awesome and hold on pretty well.

The first step you are going to do is cover your whole eyelid in this gold color.

The second step you will be doing is taking this orange/bronze color and putting in on your crease but you only want to do that on the INNER part of your eyelid (If you look at the very first photo I have of myself at the very top you can see where the orange is meant to be. If you are still confused, you can take your index finger and line the middle of your eyebrow and use that are a guide to see how far you should be going.)

The third step you will be doing is taking this red brick color and blending it into your outter crease! making sure the orange color looks nicely blended as the colors fade into each other.

The fourth step is for you to take a dark brown color and to create outter V. Make sure everything is blended and you can't see any harsh lines between the orange, red and brown.

The last step is to take any loose gold pigment and to dip your brush into Mac's Fix + or eye drops (cheaper choice) you really want your eyes to pop with this look so with this being added will make your eyelids looks 10x more better!
 
Here are the Results:

Thanks for reading! Hope you all enjoyed
xoxoxo -Morgan


Saturday, February 8, 2014

How I contour and highlight my face!

I cannot leave the house 90% of the time without atleast having some coverage on my face and a little contouring! I first started contouring my face sometime around last year and it really has made a big difference in my pictures and how I would see myself in the mirror. I learned how to contour from my favorite YouTuber Carli Bybel and I have picked up a few tricks from her and from others as well. So... with that being said I'm going to show you guys how I achieve a more leaner and slimmer face! P.S. I know I probably look like a disgusting wet dog but that's only because I really needed to wash my hair and I decided to do this blog post at the same time so no judging :-)

These are my brushes I use on a daily basis! My brushes are made by Real Techniques. From left to right: essential crease brush, buffing brush, setting brush, pointed foundation brush. And also my favorite concealer is by NYX as well! in the color yellow.
  1. The Purple Brush is more for contouring and "defining" your face. I like this use this when I really want get that perfect look.
  2. The bigger orange brush is more for buffing all your work out and helping you blend everything together.
  3. The pink brush is for any powder you want to use. I typically use it just for my contouring colors if I don't feel like using the smaller brush
  4. The pointed foundation brush is for any foundation or concealer! You can create a upside down triangle or some type of V under your eyes.


You want to highlight under your eyes, the bridge of your nose, your chin, and your forehead. Afterwards you should contour the sides of your nose, your cheekbones, your temples and your chin (optional)

Side angle


Front View
These are the colors I used to contour from a palate I have. I usually mix the colors all together.


Here is more of a visual if my pictures didn't help as much!


This is after I blended and buffed everything in. I also filled in my eyebrows for the time being.
 
Another side view!
 
Front view after everything was blended in.
 
That's the complete look on how I contour and highlight my face!
Thanks for reading my post :-) xoxo
-Morgan

Friday, February 7, 2014

Easy Valentine day nail look

Hey guys! So today I getting a little bored with my nails and just how ugly/plain they looked so I decided to jazz them up! Obviously I was inspired by valentines day since it is right around the corner.... so I thought why not do some cute nail designs :-) 

From Left to Right: In the colors TimbleBerry, Unrefined & Snow Me White

These are my natural nails just buffed out and filed down. 
 
I then took the tured pink color and put two coats on and let them dry (you can take your blow-dryer if you want them to dry faster)
 
After the main coat was finished drying, I then took my large dotting tool and dipped it into the red color and just made big large dots on the nails I wanted the designs on.

Once the red dots were dry.. I took a smaller dotting tool and placed them on top of the red dots. Now, the heart doesn't look as hard as it may seem! But I just took my large dotting tool and filled in a base of a heart. I did it in a way like "<3"just like the good ol aim days! Lol anyways, just think of it like that and afterwards, I fixed any "imperfections" I saw and outlined the heart with one of my skinny brushes meant to create lines! After the designs were done drying I added my top coat. Oh and I know the main color may look "chunky and gross" but its just a textured polish! I thought id try something new and different :-)

This a before and after of what my nails looked like side by side (I hate unpolished nails) but I just wanted to give you all a visual of how much enter nails look painted and super cute with designs!
 

TA-DAHHHH! The finished product! Super easy and super cheap to do on your own! I hope some of you guys try it out for yourselves :-)

Monday, February 3, 2014

I just did some damage at Ulta!

Whenever I go to Ulta I am always more on the look out for products for my eyes! I don't have long beautiful lashes like some people I know so I usually have to try a lot harder to get the desired eye look I really want. I have always loved the look of fake lashes that just look so real on people (If done correctly) and just how they can draw so much attention to your eye makeup. I think it just makes a whole entire makeup look more "put" together. I feel a girl can never go wrong with spider like looking lashes so telescopic is the mascara for me! I use to wear it back in middle school and have been getting back into the routine of using it a lot more. Not only does my favorite YouTube Beauty Guru recommend this mascara but it really does get into the root of your lashes to really extend them out and make them really gorgeous!

So I just went to Ulta even though I was there not to long ago but hey a girl can shop! sue me! Anyways, I picked up a few new goodies that I have been wanting to try. I saw these hair products called "BLEach BLondes" and I was curious to find out what they were so I figured why not just buy it and try it out. I also don't color my hair for certain reasons but I do rely on different type of methods such as sun in or shampoos. These were all listed for about 10 dollars but I did get the lighting spray for 6 dollars. 

I can never go to Ulta and not pick up something made my NYX! they are one of my favorite makeup brands so I have to stay loyal. I picked up a nude/light orange shade (called orange soda #588) and a matte pink shade (pale pink #04) I love the way these colors look on me. They can go with any outfit or for any day! they are perfect shades for anyone. I feel you can never go wrong with lipsticks.. especially NYX because the texture these sticks provide are so smooth and they goes on so lightly which is why I always buy them! They range from around $3.99-5.99
NYX Lipsticks
The Matte Light Pink Shade!
The colors I got (Glam nude & Gla)
Glam Nude
Gla