Thursday, April 24, 2014

IMATS NYC 2014


IMATS NYC 2014 !!!


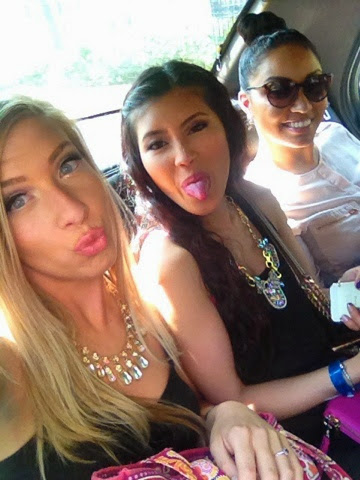
Hey thereeeee :-) so I just got back from IMATS NYC almost 2 weeks ago and it was a experience I will never forget! I'm not even sure where to begin with the madness of makeup and art. Lets see..... I traveled to NYC with two of my girlfriends that enjoy makeup just as much as I do to this event. We all took a mega bus from Baltimore and drove all the way up to New York! it only was a 4 hour drive which wasn't that bad. Once we arrived in the city and got to the location we needed to be at.. the line for the entrance was basically flooding onto the public side walks! IT WAS INSANE! but we finally made it in the doors :-) :-) :-) once we made it in.. I had no idea where to start! they had so many booths and makeup stands in every corner it was very hard to pick and choose where you wanted to explore first. The only downfall with IMATS is the lines for some of the more "popular" stands usually take 2-3 hours to stand in which wasn't what I was going to do. Soooooo..... my friends and I just jumped into the NYX stand which took about 25-30 minutes. Afterwards we ran over to the makeup forever booth which was surprisingly not long at all and we picked up our goodies and left to go venture off to other places. Since the whole entire building was SOOOO hot and my friend didn't get the foundation she really wanted from that booth.... we decided to go off into the city to MAC and do some looking there. Once I got to MAC I realized how disgusting and gross I looked since all of my makeup SWEATED off.. I just decided to wipe my makeup off in the middle of the store and redo it lol anyways... we grabbed a bite to eat and went back to pier 94 where the event was being held. We got back into the building and went straight to the Sigma line to meet my favorite Beauty Guru on YouTube Carli Bybel <3 if anyone knows me they know how much I am COMPLETELY obsessed with Carli and how excited I was to finally meet her. We got in line at 1:30 and after 30 minutes passed by we realized that we were in the WRONG line for the meet and greet -___- so with the time we wasted we had to run to the correct line for Carli's fans. We waited in line until 4:00 to meet Carli! it was the most insane thing ever but it was SOOOO worth it! Once I met Carli I was so excited! Words cannot even explain how I felt. She is someone I truly look up to and admire so much <3 so meeting her face to face was worth every minute and hour! She is one of the sweetest people ever and is not only beautiful on camera but is even more STUNNING in person! it was a surreal moment for sure. I will for sure be doing this again next year! I can't wait.
xoxoxox - Morgan


Monday, April 7, 2014

Everyday eyeshadow!

EVERYDAY EYE SHADOW!

Heyyyyy everyone! I haven't always done a eye shadow look in awhile so I figured I would do something simple. It's pretty easy and something I can always do in 5 minutes and I'm out of the door. I always tend to stick with neutral colors because they go with everything! so if you wanna figure out how I do this everyday look then keep reading :-)
Sorry about the mascara on my lids! ekkk I thought I got it all off but whoopiesss... just excuse that lol and btw.. Im really shakey when it comes to putting on my liquid eyeliners so just excuse the non perfect lines as well :)


These are where your 3 main colors are going to go!

I used MAC'S 6 color shadow called snowglobe!

Take this cream/off white color and place it all over your lid and your brow bone.

This color is a bronzey color and you are going to place that all in your crease and blend it all in!

From my picture above with the eye shadows on my lid.. I placed this in the inner corner just to add some more color! BLEND BLEND BLEND! you don't want to look like a weirdo with some red eye shadow smacked in the corner of your lid!

For the final step... I took this dark brown color and used it in my outter V!
 
That's all for now :-) I should be updating very soon since I will be heading to New York this weekend with some friends to attend a event called IMATS! (International Make-up Artist Trade Show) Its full of YouTube Beauty Guru's, high end make-up that is discounted, beauty classes and so much more! I'm so excited to attend.. it's my first year going and I think I might pass out just thinking about how excited I am. I'll be sure to post pictures :-) If you guys aren't sure what it is and wanna find out.. I'll link some videos of some of my favorite Beauty Guru's that vlogged their IMATS experiences!


Wednesday, March 26, 2014

How I fill in my eyebrows!


Hiiiiiii guys :-) so I've had some free time today and wanted to show you all how I usually fill in my eyebrows. I know a lot of people do fill them in many different ways and have many different techniques but I tend to just stick to making them look like they have some color (since I am a blonde). I only use pencils and shadow but I do think I will be picking up some gel when I go to IMATS NYC on April 13th!!!! Anyways.. If you want to know how I make my eyebrows nice and put together.. Keep reading :-)
 
STEP NUMBER 1: Pluck away any unwanted hairs and brush out your eyebrows with the eyebrow comb!
 
STEP NUMBER 2: Take your pencil or gel liner and gently outline your brows
 
STEP NUMBER 3: Fill in your eyebrows with a angled brush and a shadow (I typically use any matte brown color I have) lightly flick the brush into the hairs. Next, take a concealer and swipe the brow bone and the top of your eyebrow to clean up the work you have just completed.
 
STEP NUMBER 4: This is your complete work! :-)
 
Below I am going to insert a clip of my FAVORITE YouTube beauty guru carli! & she can show you her way of filling in her brows as well :-) Thanks for reading everyone! XOXOXO - Morgan

Wednesday, March 19, 2014

Whats in my bag?!

What's In My Bag?

 
HEY everyone!! It's been forever since I last updated this thing :-( I've been so busy with everything right now in my life and my main concern right now has been school. I've had midterms all last week and this week to :-/ so if anyone understands how I feel.. I've been a little stressed and crammed with a lot of work. ANYWAYS.... moving on! I wasn't sure what to do for a post this week so I just thought I would show off my new purse I just got a week ago and show you guys what I usually carry with me on a day to day basis. I love handbags and HUGE ones if I might add. I usually just call my purses "diaper bags" since I literally can carry anything in it (and I literally mean anything.. I once put my niece in my purse when she was about 2 to see if it could hold her lol) Usually my bags are SO messy and disgusting I could probably sell things out of my bag because of all the crap that gets thrown in there! soooooo therefore you guys are really lucky that I recently just got a new purse and you don't have to see the ugly/grossness in my bag lol. So yeah.... if you all want to know what I typically like to carry with me then keep reading :-)


How cute is this purse?!?! I died when I saw it at T.J.MAXX so I had to buy it. I usually don't care for name brand name bags as much.. just as long as they are big and really cute. I'm not even sure who the maker of this bag is but I think they did a really great job putting together a precious handbag!

Lotion is a must! I never really would put lotion in my bag because my hands always seemed smooth but until this past winter my hands were CRACKED for days and I just couldn't take the pain anymore!

So if anyone is like me.... then you probably sweat a lot!! So usually I keep a mini degree stick in my bag just in case I need it.


This is my wallet (and yes I turned my ID around so no one would judge how awful my picture was). I actually would like a bigger one that has a lot more pockets but this gets the job done for now. I got it from a little boutique around where I live and it's Vera Bradley.

Hair brushes SAVE lives so make sure you always have one in your bag! I have always carried a mini brush in my bag so I don't look like weirdo 24/7. If anyone knows me personally.. they know I shed like a dog and my hair can get ugly at times soooo this helps me out A LOT!

This is my tanning lotion that I am currently using when I go to the beds (Yes it is beat up because of all the other crap that use to be in my other bag BUT that situation is now taken care of) but I really like it and it smells super good :-)

I always have my favorite sunglasses with me and my glasses that I use to drive and read far away. I actually stole these sunglasses from my mom since I loved them so much (I think they were purchased at target and then my eye vision glasses are by Oakley if anyone is familiar with the sport gear they sell)


Recently I have been carrying my headphones around since I can never find good ones in the library when I go to study SOOOO... now I carry my own :-)

No human being should be without gum, mints or spray! I LOVE GUM and everyone should at least have a pack with them at all times!

Everyone girl needs a makeup bag.. I carry mine around with me 24/7! I usually get oily throughout the day so its always good to have.

This is just a glance inside what I have

Last but not least... LISTERINE MINT SPRAY! seriously.... this is my new fav! I just use it when I I don't even need to. It's so addicting and fun to use! I love it so much.
 
That's all for now! I promise I will upload a makeup look over spring break since mine is coming up in a few days! Thanks for reading :-)
xoxoxo Morgan


Monday, March 3, 2014

The most perfect nail polish rack!

Nail polish rack!

soooooo I totally just spent 30 minutes typing up this whole entire thing for you guys and it never saved :-( that makes me so upset but oh well!! I can't do anything about it now... anyways, I got super crafty this weekend and finally painted my nail polish rack that this awesome girl I work with gave to me for FREE :-D I was so excited to be getting one because I've been looking at some for awhile but never knew what style to pick or anything. Also, I'm really sorry that I've been more focused on my nails lately but I guess it's just cause I was so used to getting them done and now I just paint them myself :-) but I promise I will do makeup look for my next post. ANDDDDD I've been thinking about doing a makeup video but im not so sure since my camera isn't the best quality and I've never edited a video so I don't know! I keep jumping back and fourth between it but whatever!
Okay so I have never had a rack before and I am just so excited because I've been looking at some for awhile but I could never find the perfect one or one that looked like it would fit my closet door of my bathroom. BUTTTTTTT... I saw a girl that I work with had one in a picture of hers and I simply just asked where I could purchase one and she just told me I could have one for free since she had extras :-) So I am very happy that she did that for me! but here's the thing you guys really need to know about nail polish and why they NEED to by sitting upwards. When a bottle lies on its side, lacquer can work its way around the neck of the bottle and lead to the infamous pesky stuck lid! and I was storing my nail polish in a bag where I would always have to dig and search for what I was looking for :-/ BUT now that I have this I won't have to worry about throwing away good nail polish or anything like that! So I really suggest anything to get a rack or to at least store them in deep containers so they are standing up the correct way.

How cute is this?!?! I love this simple and easy design! I tried to look online for ideas but all I got was zebra and cheetah print designs. I feel like the whole animal print thing can be played out sometimes so I decided to go a easy design I have seen before :-)
 
This is what my nail polish rack looked like originally. I really loved it before hand but since the lettering was fading a little bit.. I just decided to get crafty! Oh and don't mind my kitty slippers lol I was getting ready to paint in my garage. I didn't take pictures step by step on how I did this paint job but its pretty simple and I can just list the steps below :-)
  1. Prep your area ( drop-cloth, newspaper, tape, paint, etc.)
  2. Cover everything you DON'T want paint on
  3. Prime your painting area.. you don't want the paint to crack or chip. Just think of it as makeup! you want to prime your face before so it will last longer and everything will stay on.
  4. Let the primer dry for 20 minutes. Afterwards, place glue on top (I just bought some glue in a spray can so it was a lot easier to work with) and then sprinkle your glitter all over the area you just covered in glue.
  5. After that has dried.. take your paint brush and create your zigzags and outline them in white :-) SUPER simple and easy to do!

This is my final result after I washed the rack and painted it :-) I am so happy with the results and how easy it was to do! It probably took my 2 hours to do since I had to wait for the paint and glue to dry :-) I hope you all enjoyed
xoxoxoxo Morgan